Create an S3 Bucket That Can Host a Website
If you would like to host static content, Amazon AWS is one of the easiest methods to do so with a very low cost of entry. Creating a S3 bucket is the first step towards doing so.
- Sign into the AWS Console
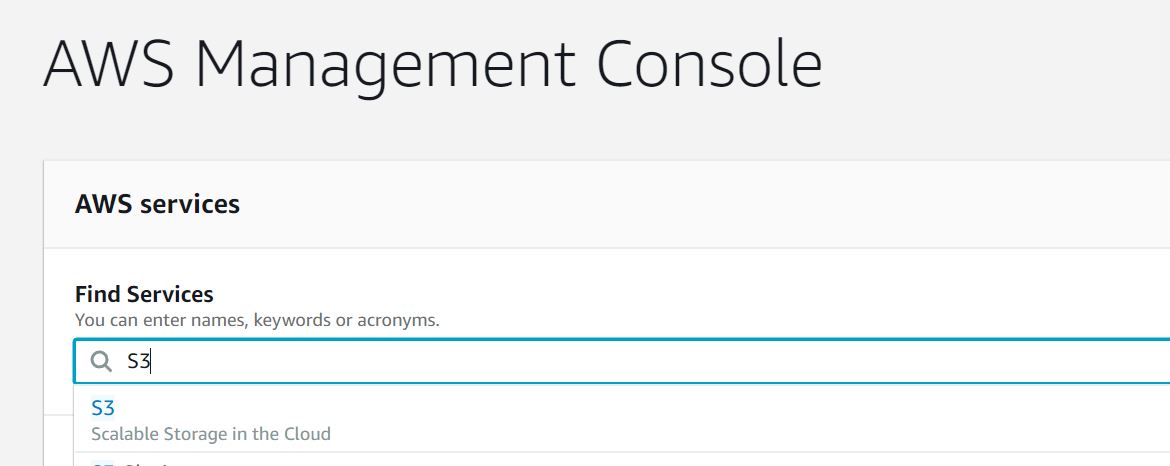
- Under “Find Services” type in “S3” and select S3.
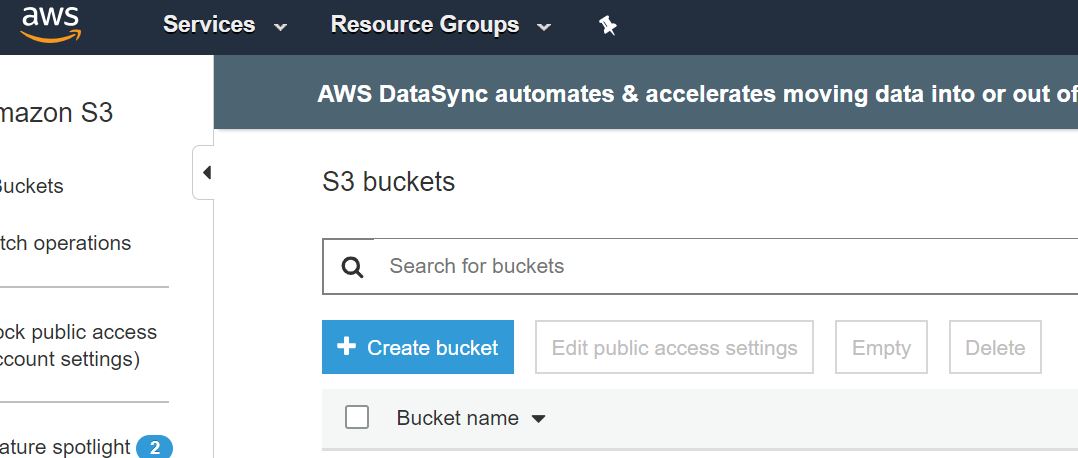
- Next, click on “Create Bucket”.
For the purpose of this tutorial I will call the bucket “tutorial-001-sj”. I have also changed the region to the one nearest me, this may vary for you, but you can leave it as the default if you are not sure or just learning. Then click “Next”. In most circumstances you will select the location nearest your target audience.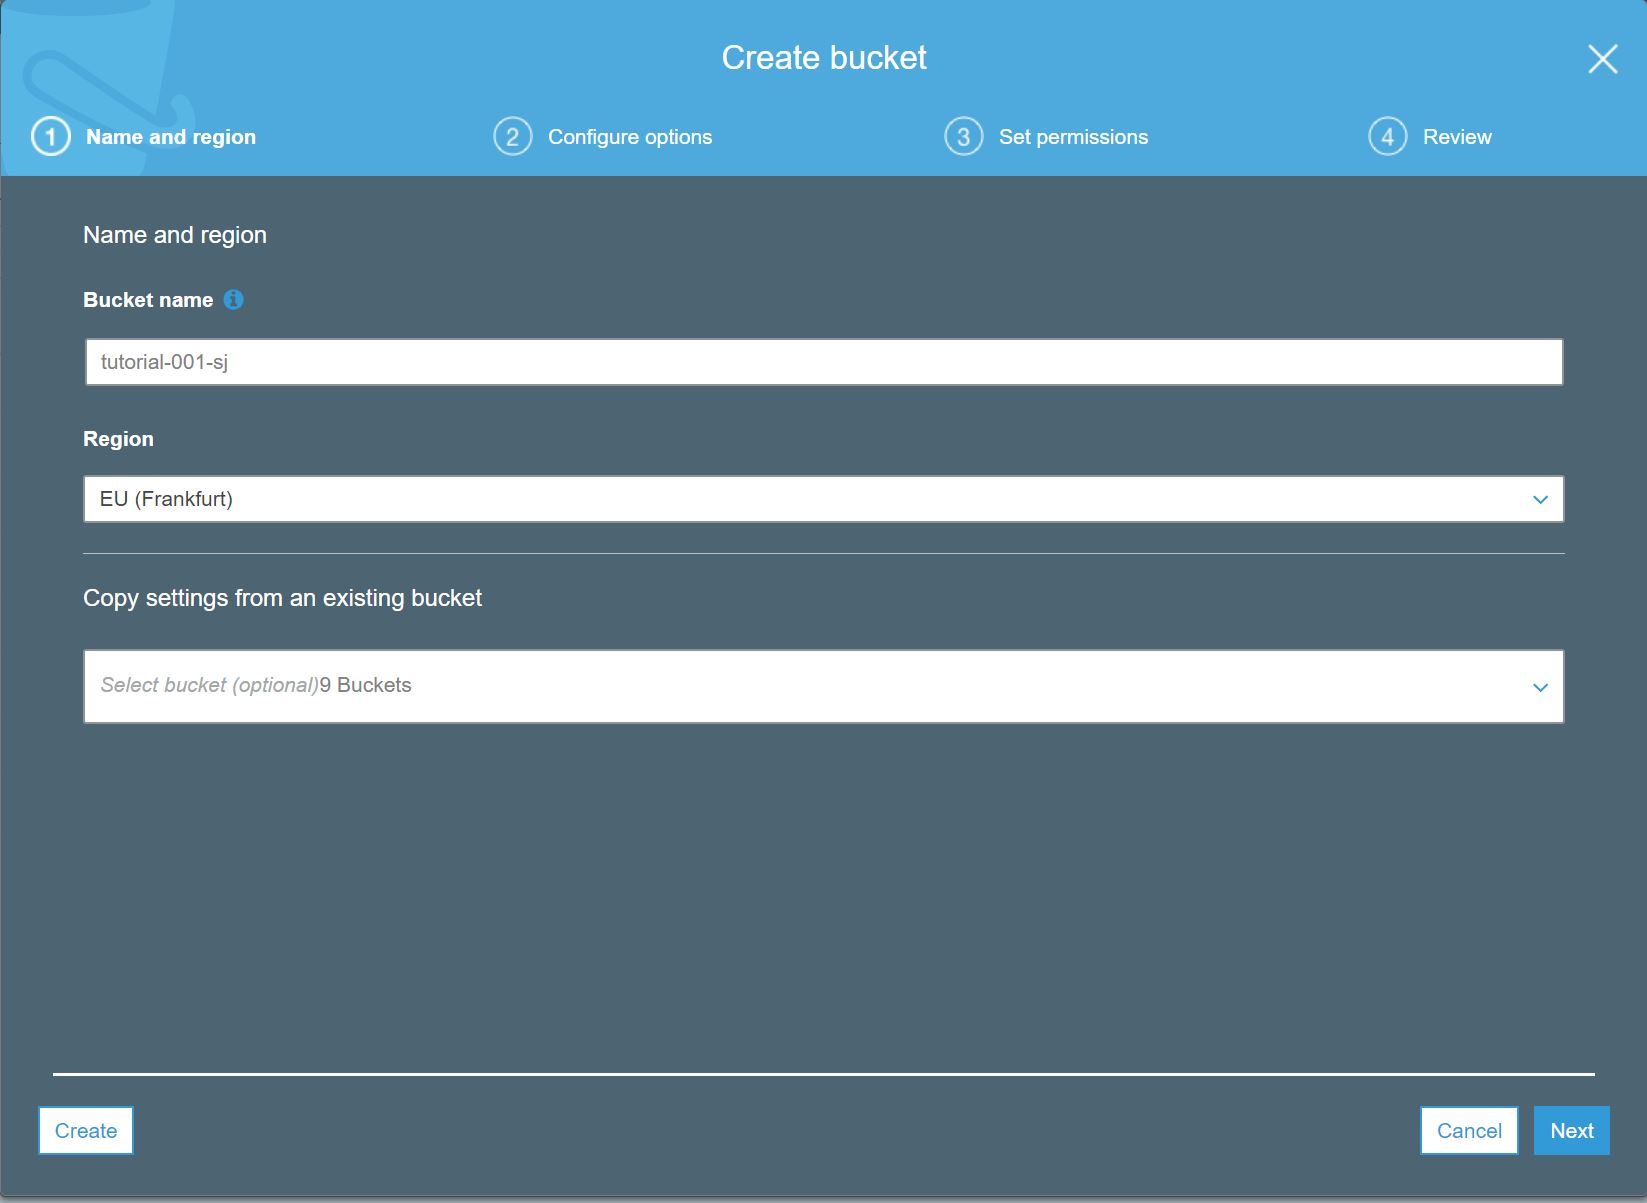
- No changes in “Configure Options”. Click “Next”.
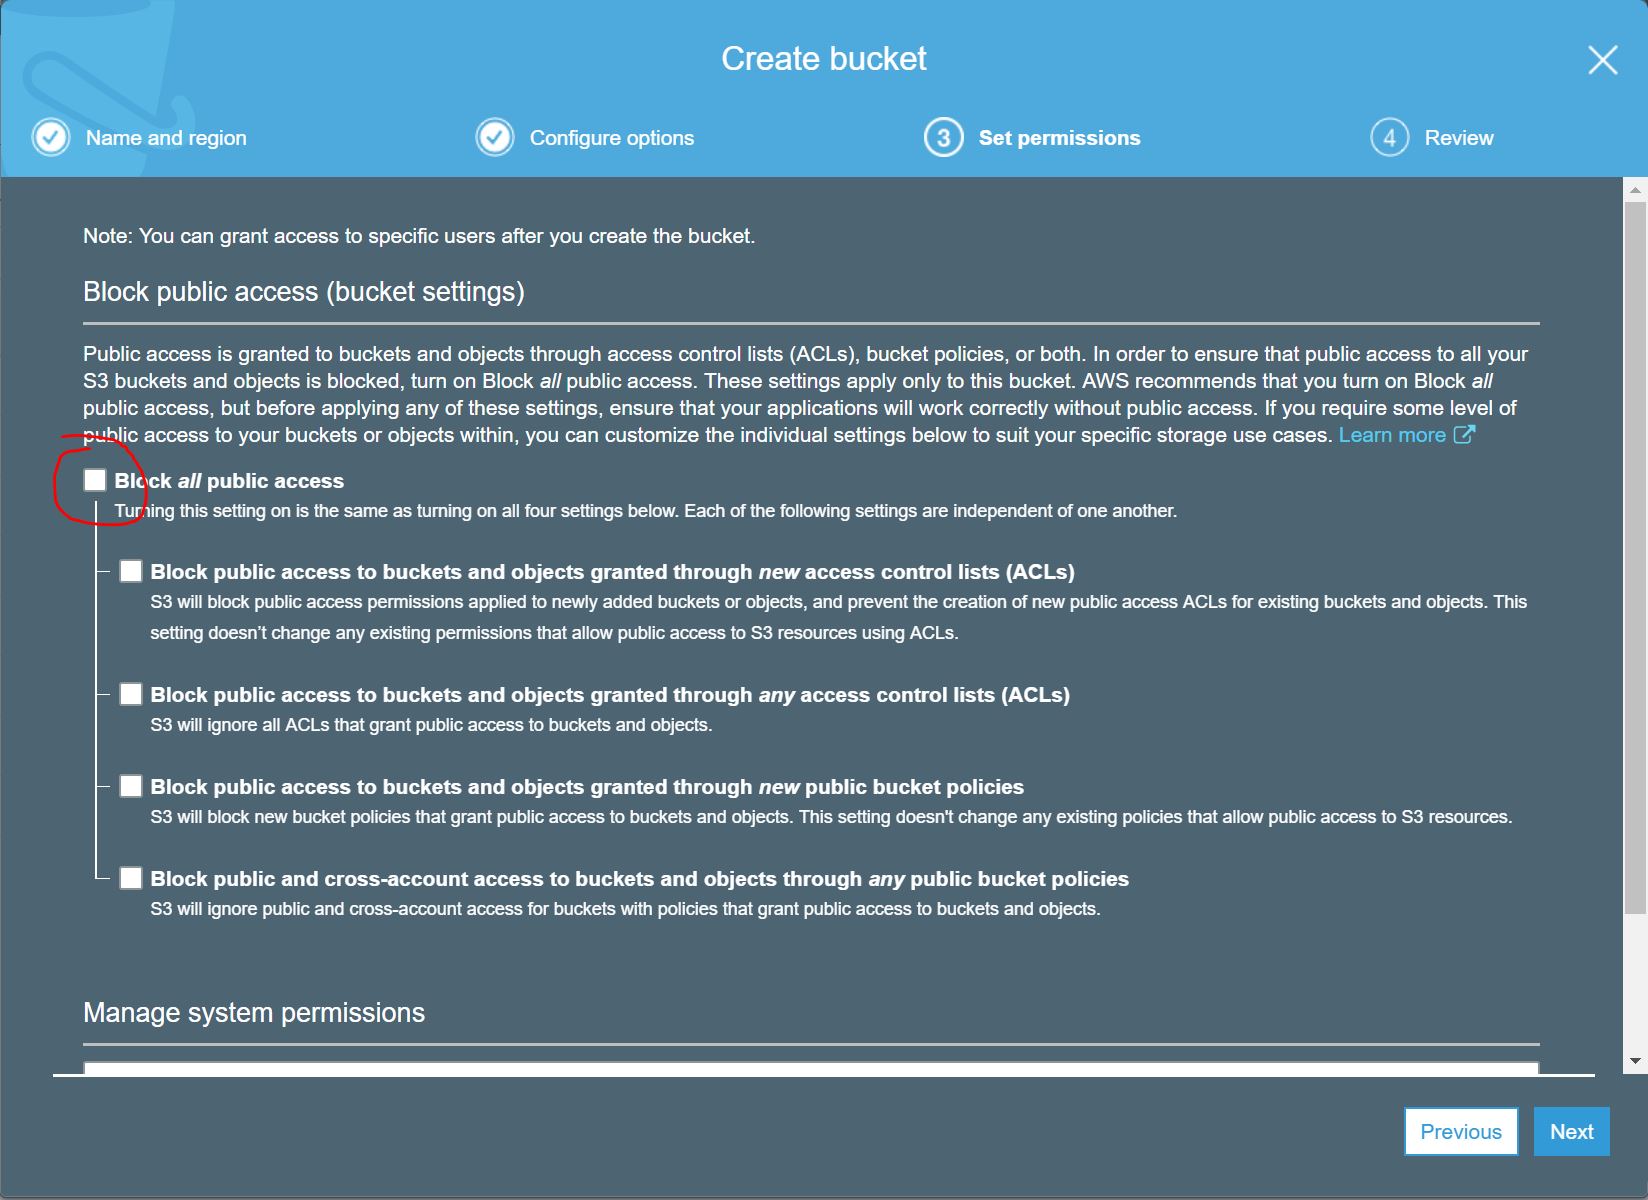
- In “Set Permissions”, un-check “Block all public access”. Then click “Next”.
- In the “Review” make sure everything looks good then click “Create Bucket”.
- At this point you will be back at the “S3 buckets” menu. You should see your new bucket. Click on your newly created bucket.

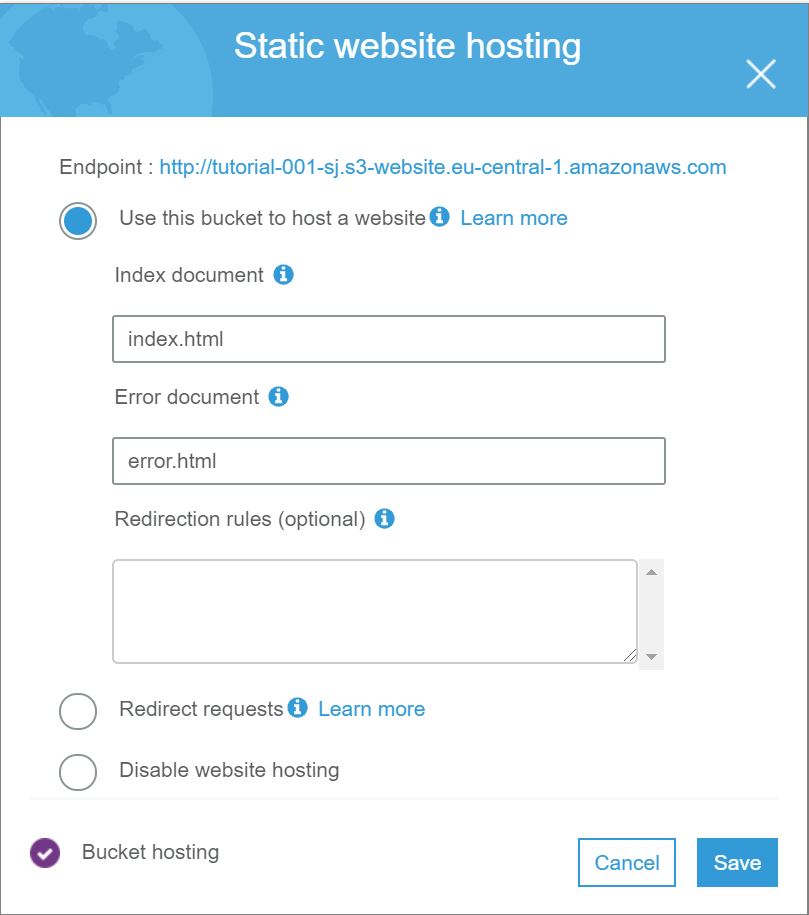
- Click on “Properties”, then click on “Static website hosting”, then click on “Use this bucket to host a website. Populate the field under “Index document” with “index.html” and “Error document” with “error.html”. Finally, click “Save”.
** Note: Some of you might see the link and try clicking it. Right now it will give you a 403 forbidden error, this is normal. There are still a few items left to change. Also note there is nothing in the bucket yet. - Click on “Permissions” towards the top of the page, then on “Bucket Policy”. You will need to paste what is shown in the picture below (code is at the bottom of the post). Ensure you replace “tutorial-001-sj” with the name you used for your bucket, otherwise it will not work! Once done, click “Save”.
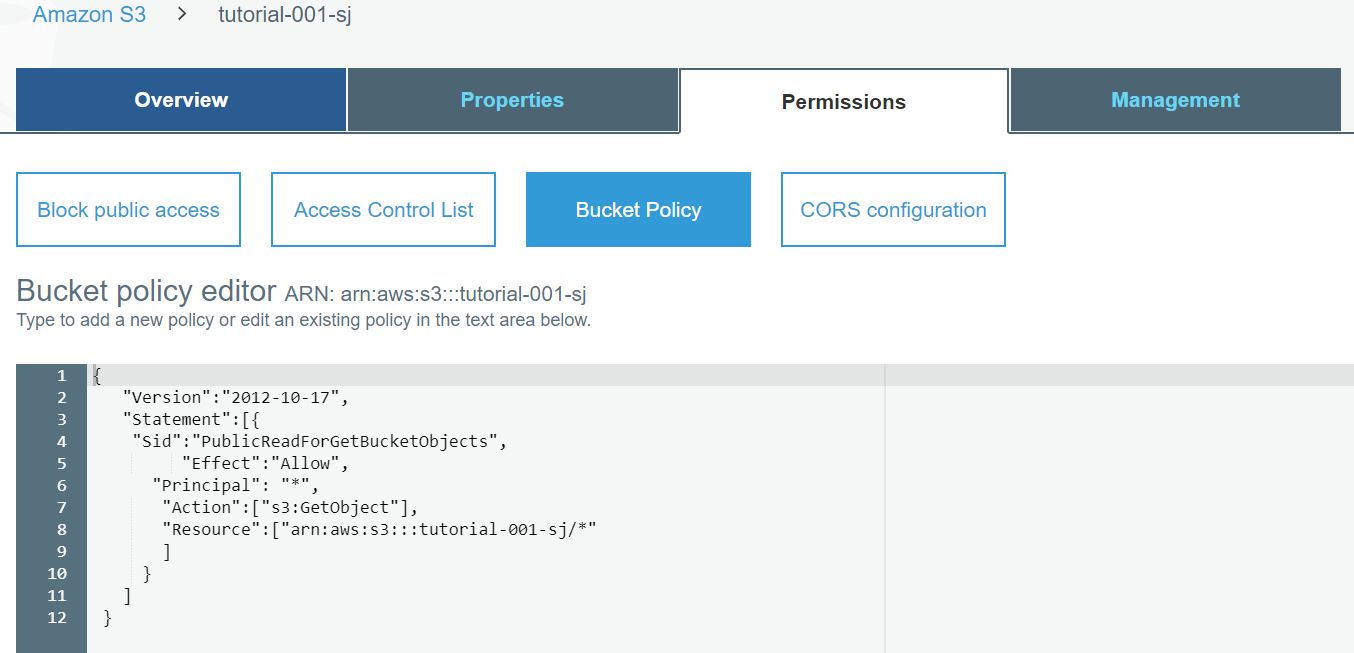
- When you click save a warning will come up saying “You have provided public access to this bucket. We highly recommend that you never grant any kind of public access to your S3 bucket.” This is expected as you are deliberately creating a public facing bucket for a website.

- Now for the fun part, click on “Overview”, and upload your “index.html” file. This is done by selecting “Upload”, drag and drop the index.html file and click “Upload”. Optionally you can upload an “error.html” file to handle errors.
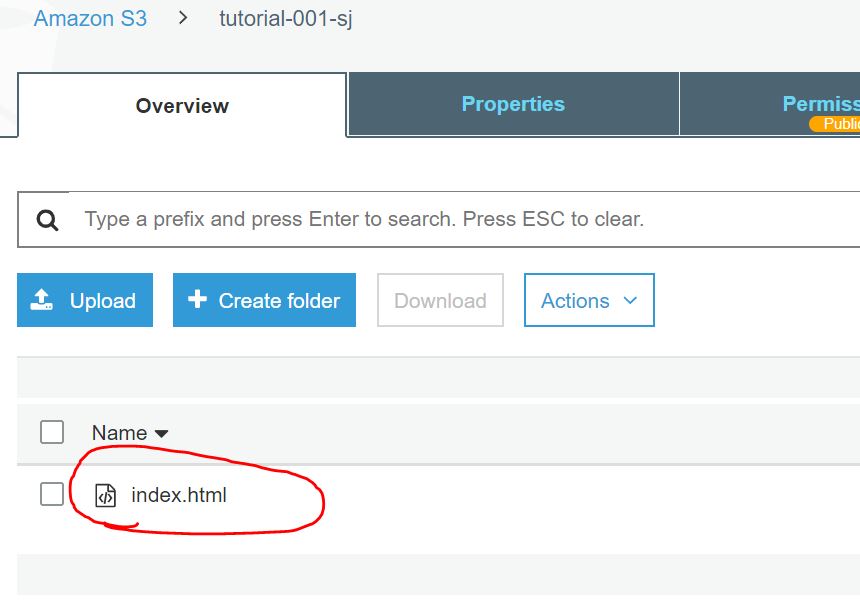
- If you are wondering what the URL for your file is, click on the the “index.html” file and look for “Object URL” at the bottom. You can click on the link and see if your page is working!
Code for S3 Bucket Below:
{
   "Version":"2012-10-17",
   "Statement":[{
 	"Sid":"PublicReadForGetBucketObjects",
         "Effect":"Allow",
 	  "Principal": "*",
       "Action":["s3:GetObject"],
       "Resource":["arn:aws:s3:::tutorial-001-sj/*"
       ]
     }
   ]
 }