WordPress on Amazon Lightsail
Lets say you wanted to host a WordPress blog and you had a small budget (first month was free when I wrote this!) but also wanted to do it in the cloud just for fun, Lightsail provides you the ability to do this.
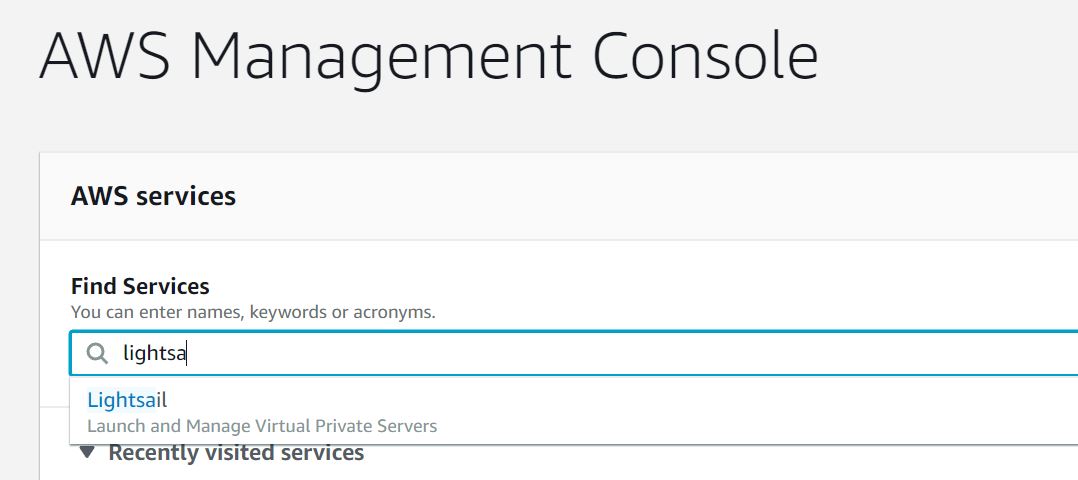
- Sign into the AWS Console
- Under “Find Services” type in “Lightsail” and select Lightsail.
- Click on “Create an instance”, under “Instance location” change the region to one that is near you. In my case I went with Singapore, under “Pick your instance image” select “Linux/Unix”, then under
Select a blueprint” ensure “App + OS” is selected and select “WordPress”.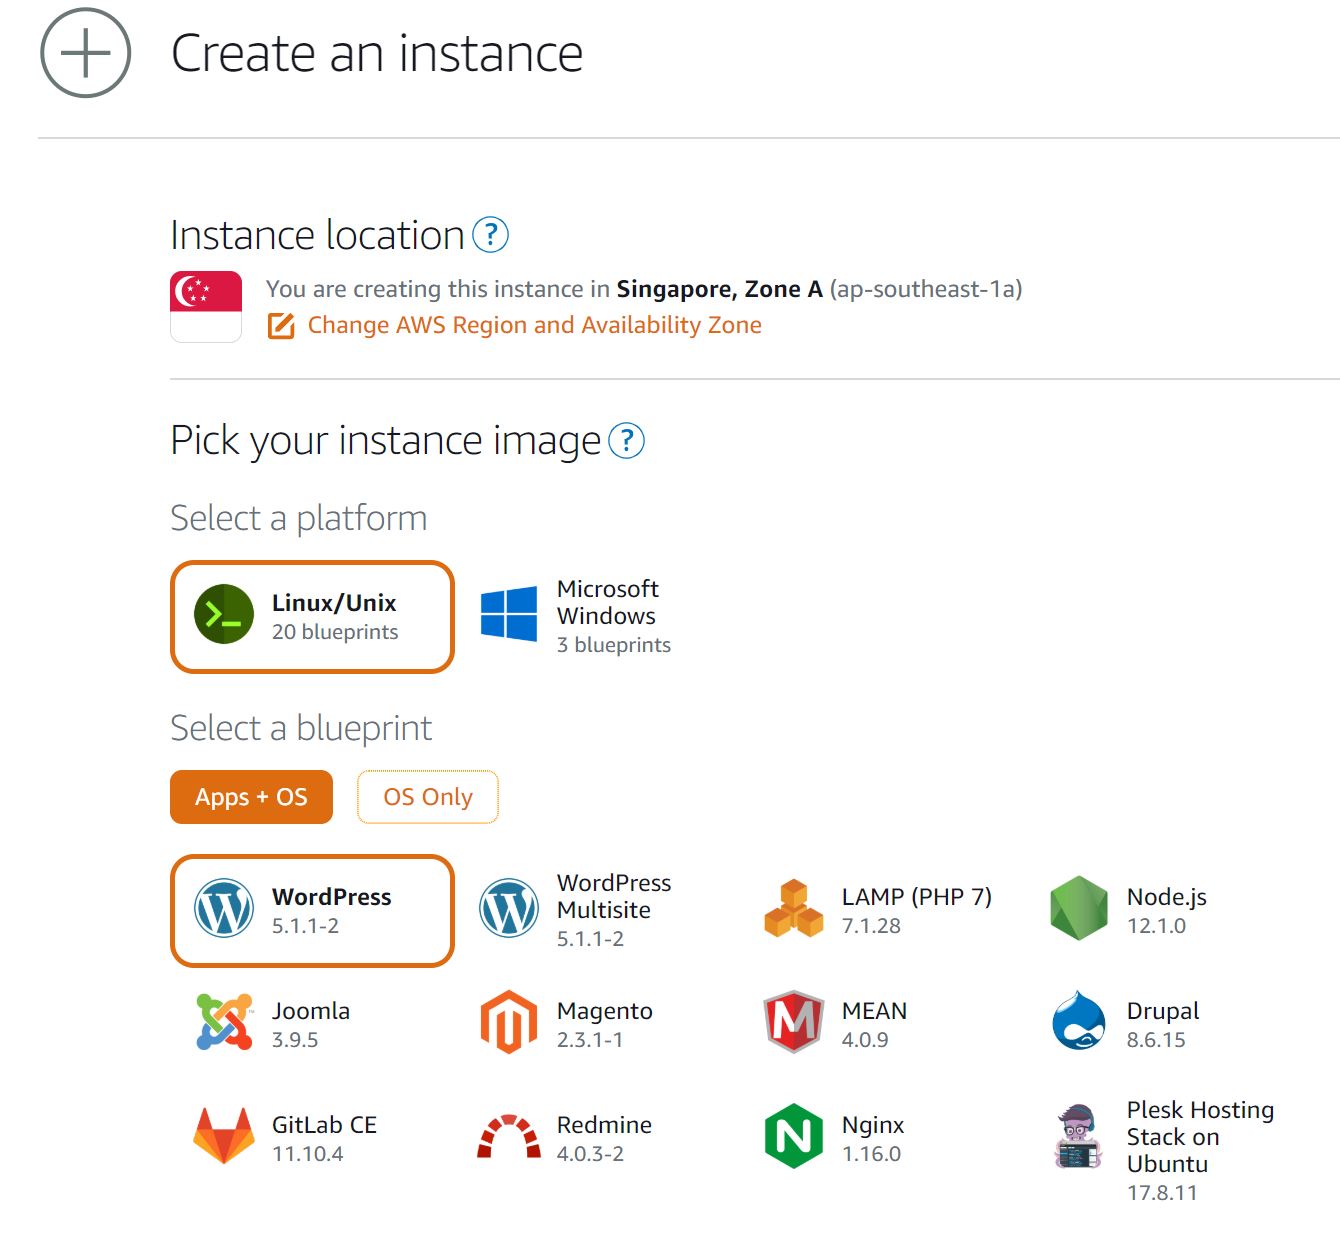
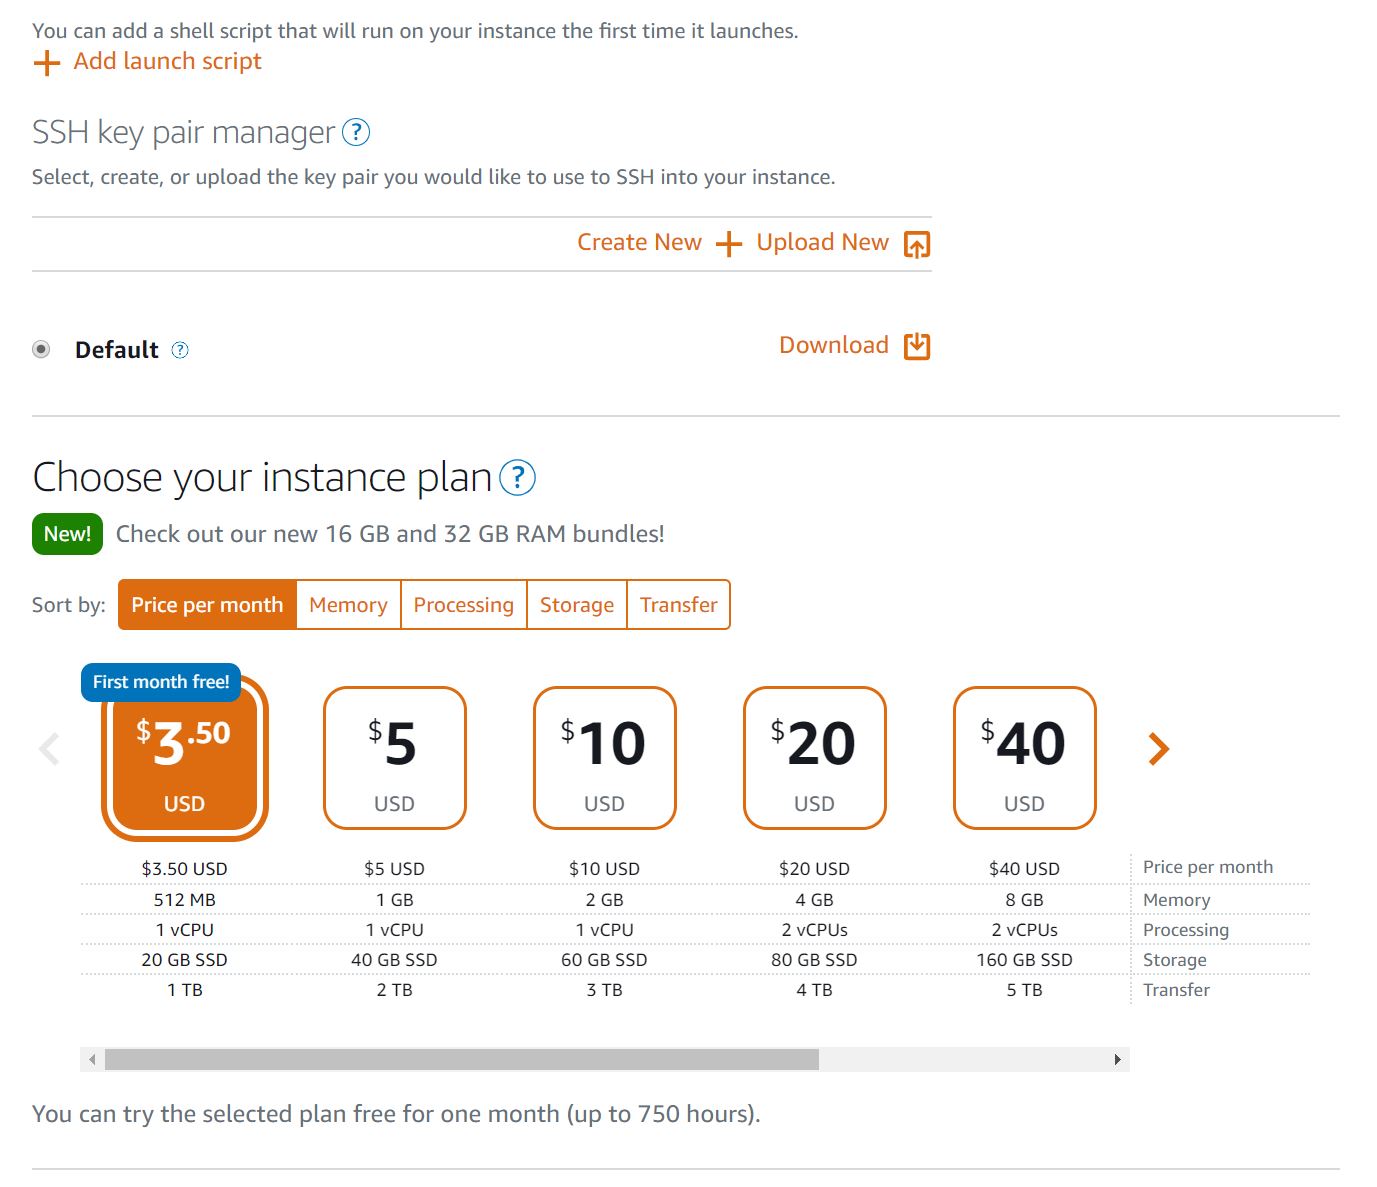
- Scroll down, and you will see “SSH key pair manager”, download the default key so you can connect via SSH (this is required to access the admin portal). Under “Choose your instance plan” I opted to use the one for $3.50 as this is just a tutorial.
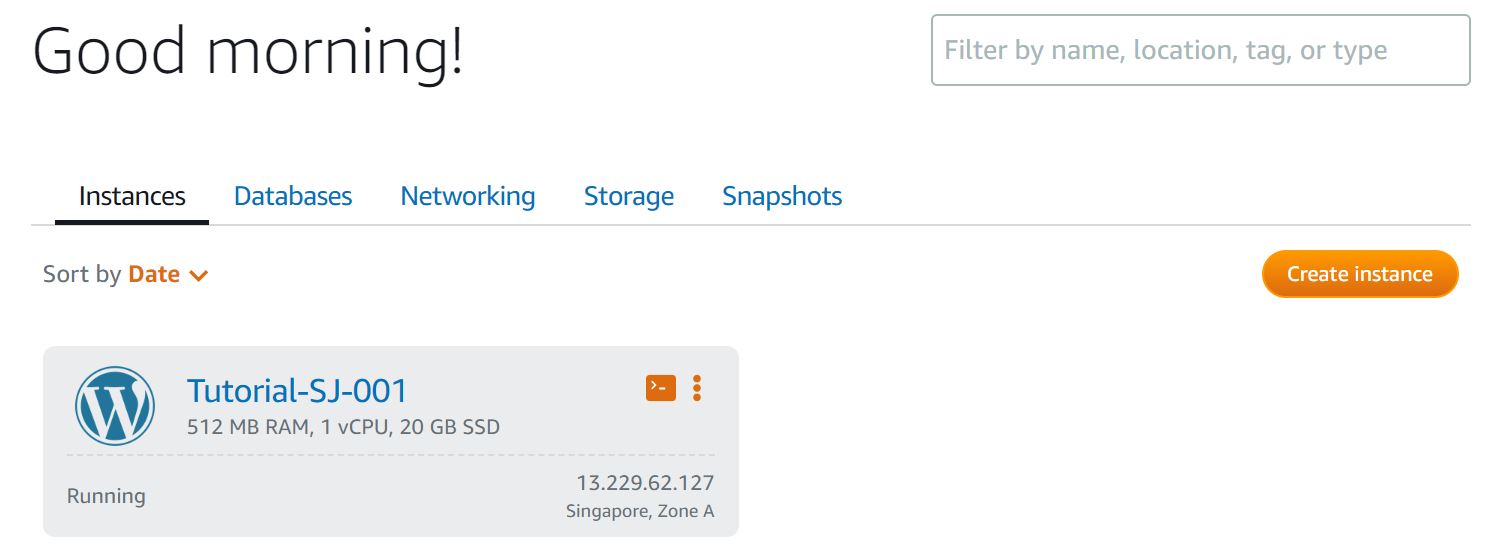
- Scroll down again, and under “Identify your instance” give your Lightsail resource a unique name. I used “Tutorial-SJ-001”. Finally, click “Create Instance”.

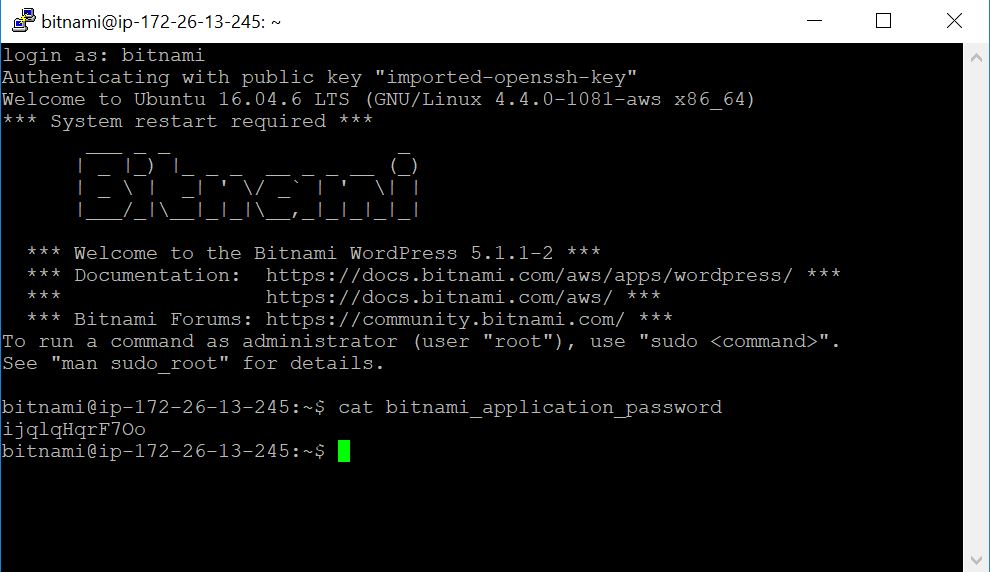
- Congrats you can now access your WordPress, but wait! We still need to do more to get the password to manage it. The first thing you will probably notice is that you have no password for the admin page.
- SSH into the host. Note: This assumes you know how to convert the PEM file into a PPK file.
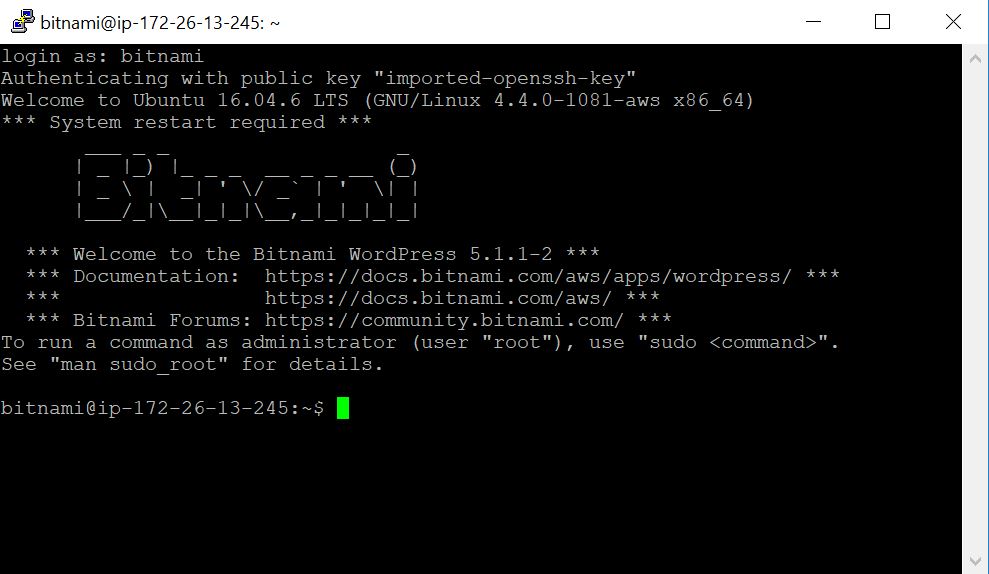
- Run the command “cat bitnami_application_password”, and you will be presented with the password!